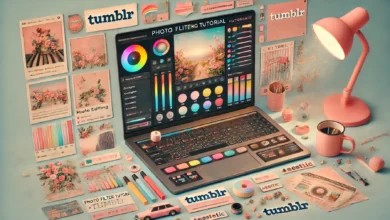
Creating a striking visual identity is vital in digital storytelling, especially on aesthetic-driven platforms like Tumblr. One of the key visual elements that define this Tumblr style is the use of dreamy pink and magenta tones. By mastering color correction pink magenta Tumblr Photoshop techniques, creators can transform ordinary images into captivating pieces of art.
Understanding the Aesthetic
The “Tumblr aesthetic” is characterized by soft lighting, nostalgic tones, and an ethereal palette dominated by pinks and magentas. These color schemes evoke emotion, enhance mood, and give content a cohesive and curated look.
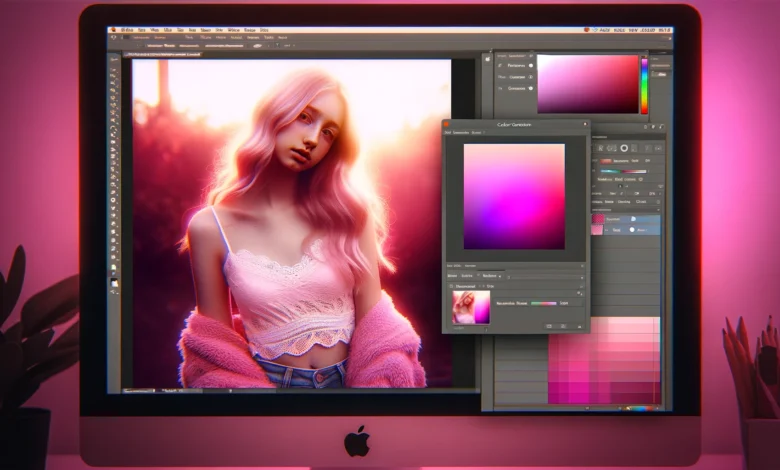
To recreate this effect, Photoshop is often the software of choice. It provides precise control over color grading, saturation, and tone curves, allowing users to tweak visuals to match their desired aesthetic. Additionally, it supports a range of file formats and high-resolution output, making it ideal for professional work.
Why Color Correction Matters
Color correction plays a crucial role in ensuring images convey the correct atmosphere. When working with pink and magenta hues, improper balance can easily result in oversaturation or unnatural tones. That’s why a structured approach to editing is essential.
Proper use of Photoshop tools can:
- Adjust white balance for more natural tones
- Enhance or tone down specific color channels
- Improve overall contrast without losing detail
- Maintain a consistent color story across multiple images
Step-by-Step Guide to Tumblr-Style Color Correction
1. Open Your Image in Photoshop
Begin by importing your image. Choose one with decent lighting and minimal color interference to allow pink and magenta tones to shine through.
2. Use Curves for Base Tone Adjustment
Curves are essential for controlling highlights and shadows. Create an “Adjustment Layer” and tweak the RGB channels individually. For a pink-magenta effect:
- Boost the Red highlights slightly
- Reduce Green in the mid-tones
- Increase Blue in the shadows for a purplish tint
This will help set the foundation for that Tumblr-style look.
3. Tweak Selective Color
Selective Color is ideal for isolating and enhancing magenta and pink tones. Under the Reds and Magentas section:
- Add more magenta
- Slightly increase the black to deepen the tones
- Adjust cyan to either warm or cool the pinks
These refinements allow for better tonal harmony without overpowering the image.
4. Adjust Hue/Saturation
Use this panel to intensify or soften specific colors. Target the Reds, Magentas, and Pinks, then gently increase saturation to make them pop. Keep in mind, restraint is key—overdoing it can lead to color distortion.
5. Apply Gradient Maps
Gradient maps overlay color effects over your image. Select a gradient that fades from light pink to deep magenta. Set the blending mode to Soft Light or Overlay and reduce the opacity to around 25%-40%.
This technique not only enhances your palette but also brings cohesiveness to your edit.
Tips to Maintain Visual Consistency
Consistency is crucial for building a recognizable visual brand, especially on Tumblr where style is everything. To maintain uniformity:
- Save your settings as presets for future edits
- Use reference images or mood boards
- Edit in batches to ensure all visuals share the same tone
Furthermore, make small adjustments with each step. It’s easier to enhance a subtle image than to fix an over-edited one.
Exporting for Web
After finalizing your edits, it’s time to export. Use File > Export > Save for Web (Legacy) in Photoshop and choose JPEG with 80-90% quality. This ensures that your images load quickly without compromising too much on visual fidelity.
Tumblr’s ideal image width is around 540px for dashboard posts and 1280px for high-resolution versions. Resize your images accordingly.
Final Thoughts
Crafting the perfect color correction pink magenta tumblr photoshop edit is both an art and a science. With the right tools and a keen eye for balance, anyone can recreate this trendy aesthetic. Transitioning from flat, unprocessed photos to soft, captivating visuals doesn’t have to be difficult. Just follow the steps, stay creative, and let your Tumblr feed bloom with style.